Crochet house plants have exploded in popularity, and for good reason. They’re low-maintenance decor that never wilts, require no watering, and bring the lush greenery vibes to any corner of your home, even those dim hallways or tiny apartments where real plants struggle. Unlike live house plants, crochet versions let you experiment with design without worrying about sunlight or humidity. Whether you’re looking for a quick weekend project or a way to refresh your living room, crocheted succulents, monstera leaves, and trailing ivy plants are surprisingly doable, even for beginners. This guide walks you through materials, basic techniques, and styled displays so you can build your own little fiber garden.
Table of Contents
ToggleKey Takeaways
- Crochet house plants are low-maintenance, never-wilting décor that work beautifully in spaces where real plants struggle, from dim hallways to tiny apartments.
- Beginners can create realistic crocheted succulents in just one hour using basic stitches like single crochet and worsted-weight yarn in muted greens, pinks, and creams.
- Yarn color selection is essential for lifelike results—choose dusty or sage greens over bright kelly green, and use thinner yarns for trailing plants like pothos for delicate, wispy effects.
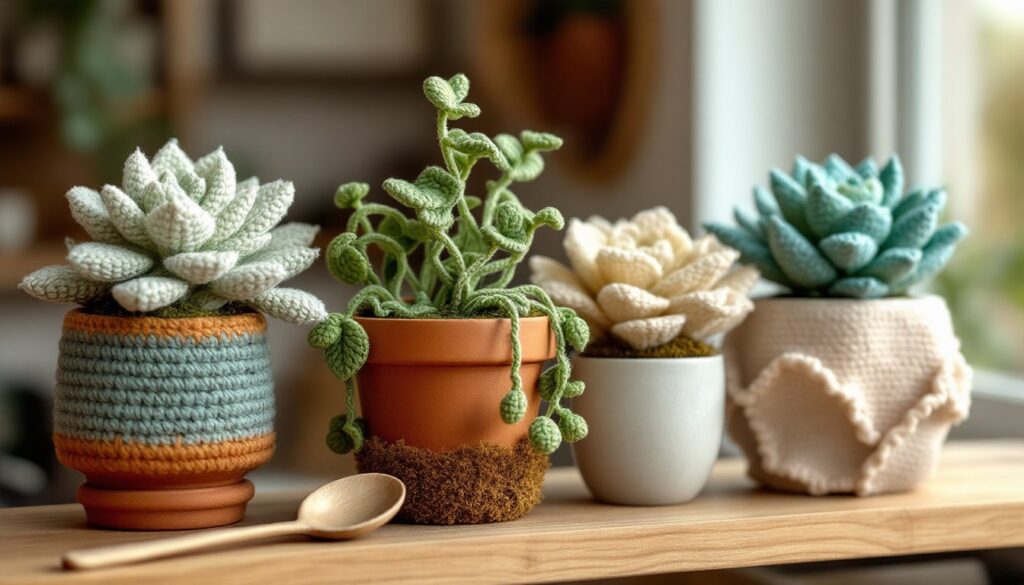
- Displaying crochet house plants in clusters of odd numbers with varying heights, neutral pots, and soft indirect lighting creates intentional, visually dynamic botanical arrangements.
- Advanced techniques like adding wire to leaf edges, practicing increases and decreases for monstera splits, and color work let you create more complex designs once you master basic leaves and assembly.
Why Crochet House Plants Are the Perfect Home Decor Project
Crochet house plants tick a lot of boxes for modern decorators. First, they’re forgiving, you don’t need perfect tension or years of experience to create something that looks great. Unlike live plants, they won’t wilt or drop leaves if you forget to water them, making them perfect for busy households or renters who can’t commit to long-term plant care. They’re also highly customizable: you can choose yarn colors to match your decor, resize pieces to fit your space, and create entire botanical collections without spending a fortune on nursery plants.
Beyond the practical side, handmade crochet plants carry a personal touch that store-bought plastic plants simply can’t match. A crocheted succulent arrangement makes a thoughtful gift, fills awkward shelving gaps, and works beautifully on desks, nightstands, or mantels. The time investment is minimal, many small plants take just a few hours to complete, and the satisfaction of finishing a tangible, three-dimensional object is genuine. Plus, since crochet house plants are trending in home decor circles right now, your handmade creations will feel both current and intentional.
Essential Materials and Tools You’ll Need
Before you start crocheting, gather your supplies. You’ll need a crochet hook (usually size G or H for most plant patterns), yarn in plant-appropriate colors, fiberfill or polyfil stuffing for three-dimensional pieces, tapestry needle for weaving in ends and seaming parts together, and stitch markers (even just spare yarn scraps work) to track your place. A yarn bowl keeps balls from rolling around, but it’s optional.
For finishing touches, have small sewing scissors, poly pellets or aquarium gravel if you want weighted bases, and simple terra-cotta or ceramic pots from any craft or garden store. If your plants need greenery at the base, moss fiber or dark green yarn scraps tucked into the pot creates a realistic nest effect.
Yarn Selection for Realistic Plant Colors
Yarn choice makes the difference between a plant that reads as “decorative” and one that looks surprisingly lifelike. For succulents, reach for dusty greens, sage, or muted teals, avoid bright kelly green, which looks artificial. Worsted weight or DK weight yarn works best: they provide good stitch definition and hold shape well. Light pink, blush, or cream yarns are perfect for echeveria or jade plant accents.
For trailing plants like pothos or string of hearts, use thinner yarns (sock weight or sport weight) to create delicate, wispy strands. Variegated yarns can add depth without extra color work. If you want realistic mottling on leaves, consider yarns with heathered or speckled colorways. Buy two to three colors per plant, one base green, one for shading or veining, and one neutral or accent color. Most small plants use under 100 yards of yarn total, so leftover scraps from other projects work great here.
Simple Crochet Plants for Beginners
If you’ve never crocheted before, start with basic stitches: single crochet, half-double crochet, and slip stitch. These three alone let you create simple leaves, flower petals, and even chunky stems. YouTube tutorials abound, but having a written pattern alongside videos helps you progress at your own pace.
Beginners should avoid patterns with extensive color changes, shapeshifting shaping, or advanced techniques like cables. Instead, look for projects marked “beginner” or “easy” on sites like Instructables or The Spruce Crafts, which often break down each step with photos.
Creating a Classic Potted Succulent
A simple crocheted succulent is the perfect starting point. This project uses basic single crochet and requires about 50 yards of yarn and one hour of your time.
What You’ll Need:
- Worsted weight yarn in sage green, dusty rose, and cream
- Size G crochet hook
- Fiberfill stuffing
- Small terra-cotta pot (2-3 inches)
- Tapestry needle
Steps:
- Crochet individual leaves. Chain 8 stitches in sage green. Single crochet back down the chain, increasing on the sides to create a teardrop or oval shape (roughly 6 rows). Fasten off and weave in ends. Repeat to make 8-10 leaves.
- Create the base rosette. With dusty rose yarn, chain 4 and slip stitch to form a ring. Work 12 single crochet stitches into the ring. Cut yarn and weave in ends.
- Attach leaves to the center. Using your tapestry needle and matching yarn, sew each leaf around the rosette center, overlapping them slightly as you go. Don’t worry about perfection, natural succulents are irregular.
- Stuff and assemble. Stuff the center lightly with fiberfill to give it dimension. Sew the entire plant base to your terra-cotta pot so it sits snugly.
- Add texture. Use cream yarn to create tiny veining details on a few leaves, or leave plain for simplicity.
This project teaches you fundamental skills: reading patterns, creating three-dimensional shapes, and combining pieces into a finished object. Once you’ve made one succulent, you’ll spot variations everywhere, echeveria, jade plants, aloe, all made with the same basic leaf technique in different colors and sizes.
Advanced Plant Designs and Techniques
Once you’re comfortable with basic leaves and assembly, you can tackle more complex plants. Monstera deliciosa with its signature split leaves requires practicing increases and decreases to shape the fenestrations (holes) realistically. Trailing pothos or string of hearts use thin yarn and chains to create long, wispy strands that cascade naturally from a hanging planter.
Textured plants like succulents with ruffled edges use techniques like half-double or double crochet to create volume. Flowering cacti layer petals and add dimension with strategic stuffing. Patterns for these plants are more detailed and may take several hours, but they follow the same core principles: single pieces, assembly, and finishing touches.
Advanced colorwork, like crocheting stripes or spots directly into stitches, lets you create variegated leaves without constantly switching yarns. If you want ultra-realism, try adding wire to leaf edges before stuffing: thread a thin floral or craft wire along the inner edge of each leaf so you can gently bend them into natural curves. Sites like Martha Stewart’s crochet plant pattern collection showcase patterns that range from beginner-friendly to intermediate.
Don’t be afraid to modify patterns, either. If a pattern calls for 20 leaves and you want a bushier plant, make 30. If colors don’t match your room, swap them. These projects are yours to personalize.
Styling and Displaying Your Crochet Plant Collection
The magic happens when you display your finished plants. A single crocheted succulent looks nice, but a cluster of three or five in varying sizes and colors feels intentional and lush. Group them by height: taller plants in back, shorter ones in front, all within arm’s reach on a shelf or side table.
Pot choice matters. Neutral terra-cotta, white ceramic, or concrete planters let your crochet work shine. If you’re going for a bohemian vibe, woven baskets or macramé hangers work beautifully for trailing plants. If your décor is modern, sleek matte black or gray pots frame the plants cleanly.
Layering with real elements adds depth. Tuck actual moss or faux moss around the base of crochet plants to ground them visually. A small spoon or garden tool propped beside a pot creates a playful, “garden in miniature” moment. Add low-light house plants or trailing real ivy in nearby pots to blur the line between handmade and natural, visitors will do a double-take.
Lighting counts too. Position your crochet plants where they catch soft, indirect light. Natural window light enhances yarn texture and colors without fading them. If you’re styling a dark shelf, a small warm-toned LED grow light or string of tiny fairy lights above or beside your collection draws the eye and adds cozy ambiance.
Displaying your plants on floating shelves, in a bookcase corner, or on a plant stand creates visual interest without taking up floor space. Odd numbers and varied heights create more dynamic arrangements than rows of identical pots. And don’t hide them away, crochet house plants are meant to be admired, so give them prime real estate in rooms where you and guests spend the most time.